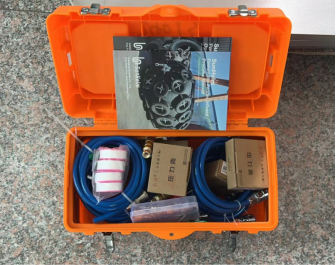
Inflating and deflating inflatable pneumatic fenders is a straightforward process, but it’s crucial to follow the manufacturer’s guidelines and use the correct tools to avoid damage and ensure optimal performance.
General Principles:
- Manufacturer’s Guidelines are Key: Always refer to the specific instructions provided by the fender manufacturer (e.g., Yokohama, Sunhelm, NANHAI ) for your particular fender model. These will specify the recommended inflation pressure, valve type, and any special considerations.
- Avoid Over-inflation: Over-inflating can damage the fender material, seams, and valves, and can void warranties. Fenders should be firm but still have some “give” – you should be able to depress the sidewall slightly with hand pressure (often around 1/4 to 1/2 inch).
- Lubricate the Valve: Before inserting any inflation needle or adapter, always lubricate the valve with soapy water or a non-solvent-based grease. This helps prevent damage to the rubber valve and ensures a good seal.
- Use the Right Tools:
- Inflation: A hand pump, foot pump, or air compressor with the appropriate adapter/needle is typically used. Avoid high-pressure air compressors (like those at service stations) unless specifically designed for fenders, as they can lead to over-inflation.
- Deflation: Often, a long, thin, blunt object (like an Allen wrench, Phillips screwdriver, or stiff wire) is needed to depress a backflow prevention flap inside the valve.


Inflation Steps:
- Identify the Valve Type: Inflatable fenders typically have a valve similar to those found on sports balls or a removable screw-plug valve. Some fenders may have a “Tri-Valve” that can be opened with a Phillips head screwdriver or a coin.
- Prepare the Valve:
- Needle Valve (Sports Ball Type): Lubricate the inflation needle.
- Screw-Plug Valve: If applicable, remove the screw plug from the valve.
- Connect the Pump/Compressor:
- Needle Valve: Insert the lubricated inflation needle into the center hole of the valve until it’s fully seated.
- Screw-Plug Valve (with valve removed): Place the air gun or pump nozzle tightly against the opening on the fender.
- Screw-Plug Valve (with valve in place): If the valve has a central hole for inflation, place the air gun tightly against the face of the valve, aligning with the hole.
- Inflate Gradually: Slowly inject air into the fender.
- Monitor Pressure/Firmness:
- Pressure Gauge: If using a pump or compressor with a gauge, inflate to the manufacturer’s recommended PSI (often between 1-2 PSI or 0.15-0.2 bar).
- Manual Check: If no gauge is available, inflate until the fender is firm but still slightly “dentable” when pressed with your hand. The sidewalls should not bulge. Some manufacturers recommend being able to depress the sidewall about 1/4 to 1/2 inch with light hand pressure.
- Remove Inflation Tool: Once inflated, carefully remove the needle or nozzle.
- Seal the Valve:
- Needle Valve: The valve should self-seal.
- Screw-Plug Valve: Quickly replace and securely tighten the screw plug. Be careful not to overtighten, as this can damage the threads or valve.

Deflation Steps:
- Locate the Valve: Identify the inflation/deflation valve on your fender.
- Open the Valve:
- Needle Valve (Sports Ball Type): Insert the inflation needle (without a pump) into the valve. This will depress the internal flap and allow air to escape.
- Screw-Plug Valve: Unscrew and remove the screw plug.
- Release Air:
- For valves with a backflow prevention flap: Insert a long, thin, blunt object (like a hex key, Allen wrench, or stiff wire) into the valve opening to depress the flap, allowing air to escape.
- For some larger fenders: Some models may have a built-in blue deflation valve, where simply unscrewing a white screw allows air out without needing a tool to depress a flap.
- Expel Air: Apply pressure to the fender (e.g., by rolling or squeezing it) to force the air out.
- Close the Valve: Once deflated, remove the object (if used) and securely replace the screw plug or needle.
Important Considerations:
- Valve Maintenance: Regularly inspect and clean the inflation and deflation valves to prevent dirt and debris buildup.
- Storage: When not in use, store deflated fenders in a cool, dry place away from direct sunlight and extreme temperatures. Storing them flat, rather than folded, is generally recommended.
- Leaks: If you notice air loss, inspect the fender for visible holes or leaky valves. Small leaks can often be repaired with a manufacturer-recommended repair kit.
By following these steps and paying attention to your fender’s specific requirements, you can effectively inflate and deflate your pneumatic fenders for proper use and extended lifespan.


